How to use takeoff software in the construction industry

Many construction projects begin at the estimating stage. In order to complete a bid, the construction contractor must be able to work out an estimate of the cost of work and present this for review. Each construction estimate will have three key areas; a list of materials and their associated costs, equipment hire costs and the labour required.
Whereas before this process would have involved printed plans and blueprints with hours of manual counting of the different elements (and a mess of highlighter), today the construction industry has adopted software to make the role easier.
What is a construction takeoff?
A takeoff is a process that helps construction companies estimate a project of any size by counting and measuring the different symbols on the building plans. This completes the first area of the tender bid, successfully counting the materials so that a cost can be applied and multiplied by each one.
There are a few different methods for performing a takeoff and it’s important to know the difference. Manual takeoffs involve pen and paper; printing out blueprints and drawings and counting every symbol by hand. Digital takeoffs involve uploading digital versions of your drawings and counting manually (but on your screen rather than by hand).
“Automated takeoffs” performed in true takeoff software is a different method to digital takeoffs where the user should only have to specify a symbol such as a light fixture once, to ensure it’s counted throughout that entire drawing, and any others within the project. This automates the counting process and makes it much faster, as each symbol for a light or fire alarm only needs selecting once to be counted across every instance.
In construction, where you might have more than 10 different disciplines to accurately count and estimate, from flooring to electrical, and plumbing, choosing automated takeoff software will make a huge difference to time and accuracy.
With construction takeoff you can use the software to quickly count and estimate various symbols across lighting, electrical, HVAC, flooring, framing, plumbing and even painting, amongst others.
Ways you might use takeoff software in construction might include:
- To measure different floor areas in order to accurately price each material needed
- To count studs, joists and rafters
- For quickly counting every electrical switch, as well as measuring cable and containment lengths
- To measure A/C lines
- In order to count fire alarm systems and check radius to ensure all floor space is covered
- For counting security alarm systems and checking the radius of entry points
- To measure wall and ceiling lengths for accurate painting & decorating cost estimates
All of these elements together help create a full picture of the material costs within a construction project and can help you estimate what’s needed in terms of labour and equipment, helping to improve your construction estimate. Once you have the accurate counts for each division these can be copied from the Excel spreadsheet into your estimating software or full estimating proposal. Once a price is applied to each item this can be multiplied by the count of items and you’ll have an accurate estimate for each item within the project.
How do you purchase construction takeoff software?
Many construction takeoff packages will charge per seat, which is great for smaller construction companies or estimators who may want to produce bids quickly, without committing to huge overheads. Otherwise, you can purchase a package that allows multiple surveyors or project managers to access the software, and share file access across projects.
Most takeoff software today is also cloud-based which means that your estimators or surveyors can work collaboratively and access files from anywhere. Gone are the days of on-premise systems and servers, the huge rise in cloud-based options gives a freedom that the construction industry hadn’t previously seen.
Different elements of takeoff software for construction
Within construction takeoff software there are often two core features that help takeoff the project:
1. Count
With true construction takeoff software you can upload PDF plans and create a description for each symbol you’d like to count before choosing the corresponding symbol and reference. For example, telling the software that A is one type of light fitting and AE another, so that you can later give each fixture a different price in the estimate. Once you’ve told the software what each symbol is called and what the symbol looks like, it’ll count every single instance. Working through your uploaded drawings providing you with a true count of each one. The output of the count is usually a downloadable file, in an Excel spreadsheet, with the counted symbols organised by discipline.
Here’s an example of the output of the Excel spreadsheet for a construction takeoff in Countfire with each symbol counted:

2. Measure
Full takeoff software will also offer a “measure” capability which allows for freedom of drawing and pinpointing of lengths, such as conduits and wiring.
This is useful in construction projects to accurately measure everything from containment, to flooring meterage and even walls and ceiling surface length.
Best of all, you won’t need to note down each meter or square footage as this will be automatically saved against the discipline and plan you have selected, saving you time. What follows is a full breakdown of each symbol, counted as specified and organised by the titles you’ve selected.
How to do a construction takeoff
Here’s an example of how to use a takeoff software such as Countfire to accurately estimate one part of your construction project, such as the electrical costs.
Create project and disciplines
Before you begin counting you’ll need to create your construction project and add disciplines within the project for your different areas, for example one discipline may be “Fire Alarm, PAVA & Call Systems” and another “Containment” or “Power”.
Spending a bit of time looking at your naming conventions at this stage will help when you get the final Excel spreadsheet of counts, as everything will be organised under the heading of the discipline you have selected.
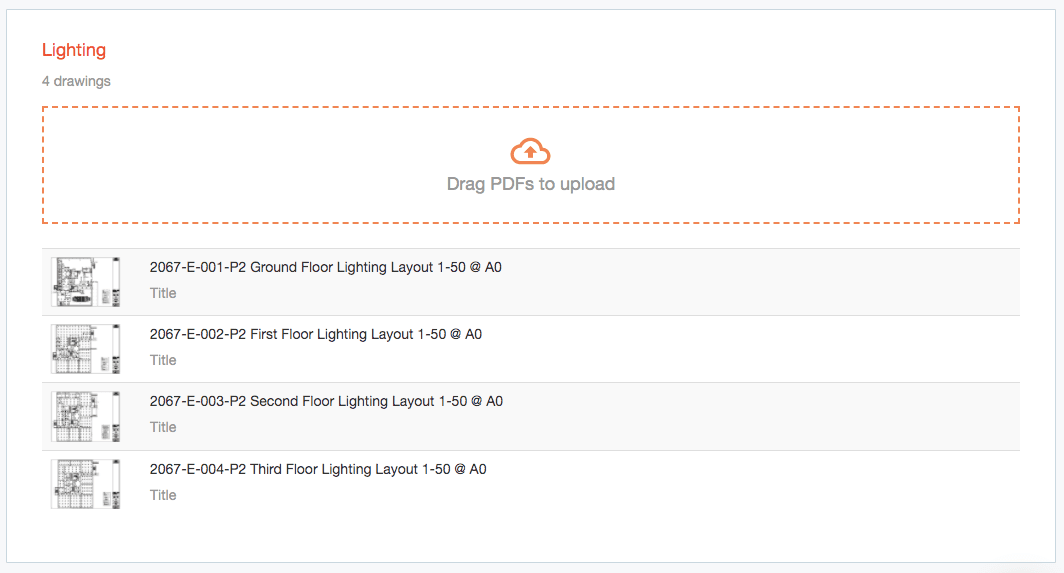
Upload drawings
Once you’ve organised all of your disciplines you can upload each set of drawings. Here’s an example of what a discipline will look like with plans uploaded:
Create symbol descriptions
Once your drawings are uploaded (see further tips here for how to optimise your drawings before you begin) you can choose a drawing to begin working on. Select “Back to app” to move over to your workspace. Choose the Project and Discipline you want to count first and remember - once you’ve told Countfire the symbol and its description it will count all versions of that selection through all of the drawings within the discipline.
Create a name and description for the symbol you would like to count. Then use your mouse or trackpad to zoom in and out of the drawing and choose “Select” to draw a box around the symbol. You will then begin to see the count of that symbol within your drawing.
Measure lengths
The Measure tool is useful for lengths that require measuring of linear runs and areas, such as conduit and containment. You can measure in three ways here:
- Measure linear runs (perfect for containment)
- Measure area (floors, walls and room lengths)
- Add manual counts (for any items not on design)
See our full guide on measuring here for details on how to add colours and labels to each symbol description.
Quality check your drawings
Once you’ve created all of your symbol descriptions and told the system what to count and measure, it’s important to move through the quality check process. There are four in-built steps in the Countfire workflow to enable four stages of checking for higher count accuracy.
Once the first three steps have been completed within your project, you’ll receive the final output. For every one drawing in you’ll receive two back out. One of which will have “rem” in the file name to show you what’s been “taken off” or removed in the drawing. Anything you still see likely won’t have been counted, allowing you an extra point of reference to go back and include further symbols.
You’ll also receive a check sheet, an easy to view list of symbols for each discipline within the project allowing you to scan and see any symbols which may have fallen under the wrong symbol description.
Revisit and make changes
Once you‘ve completed all of the steps in finalising your project, your processed project will appear in your shared Dropbox folder. From the Excel spreadsheet you can copy your final counts into your estimate or tender response, ready for submission.
Often, estimating a construction project doesn’t end with the first set of drawings. Projects grow in size or change after they’ve been won and having to revisit plans is a big part of the role. With Countfire, new plans can be uploaded and counted quickly, or previous plans can be revisited and edited. This helps surveyors and project managers to stay on top of the ever changing nature of construction bids.
Final thoughts
The construction estimating process can be lengthy but with takeoff software to help produce bids and tenders, you can make fast progress. Give the Countfire free trial a go today to see how easily you can begin using takeoff software for your construction projects.
Related articles

Amendment 4 to BS 7671: What electrical contractors need to know
The UK's wiring regulations have been updated. Amendment 4 to BS 7671:2018 is now published, one of the most significant updates to the UK's wiring regulations in recent years. Find out what's changed and what it means for your work.
Read article
Construction industry trends for 2026
What are the emerging construction trends for 2026? Here are some of the key developments in tech, sustainability, workforce and materials that are set to influence how construction projects are delivered.
Read article
Is electrical prefabrication worth it?
Electrical prefabrication is growing in popularity. How does it stack up in terms of benefits for electrical contractors?
Read article